Close
All Categories
    Filters
    Preferences
    Search
    RSS

    Strand Hardware Blog

    Elevate Your Woodworking Precision: Creating a Jig for 45-Degree Mitres
    0 Elevate Your Woodworking Precision: Creating a Jig for 45-Degree Mitres

    When delving into framing or segmented woodworking endeavours, achieving precise 45-degree mitres becomes an essential pursuit. While this may appear to be a daunting task, fret not! We present a remedy – a self-fashioned jig that serves as your ticket to attaining the exactness you require. In this piece, we will escort you through the entire fabrication process of this jig, shedding light on the steps involved and the safety precautions to bear in mind.

    Constructing the Jig: Step by Step

    Step 1: Preparing the Hardwood Strips

    To initiate the fabrication of your accurate 45-degree mitre jig, you'll necessitate a duo of hardwood pieces. These segments should slot neatly into the milled grooves of your saw table, with a slight variance in width – causing the left component to be marginally narrower. Affix the left strip firmly using screws and adhesive, ensuring its secure placement. The right strip necessitates elongated screw apertures to permit lateral adjustments. Remember, the strips should glide against the outer edges of the grooves for optimal efficacy. To facilitate seamless motion, administer a coating of wax to the runners. Even if your saw table boasts a solitary groove, rest assured – this methodology still applies.

    Step 2: Opting for Appropriate Platform Material

    For the foundational base of your jig, Supawood proves to be an impeccable selection owing to its steadfastness and resistance to warping. Cut a Supawood piece to dimensions approximating 500x400, laying the groundwork for your jig's structure.

    Step 3: Integrating the Hardwood Strips

    Insert the pair of pre-prepared hardwood strips into the crevices of the saw table. Following this, firmly affix the Supawood piece onto these strips using screws. This juncture constitutes the core structure of your jig, forming the bedrock for achieving meticulous 45-degree mitres.

    Step 4: Infusing the Desired Angle

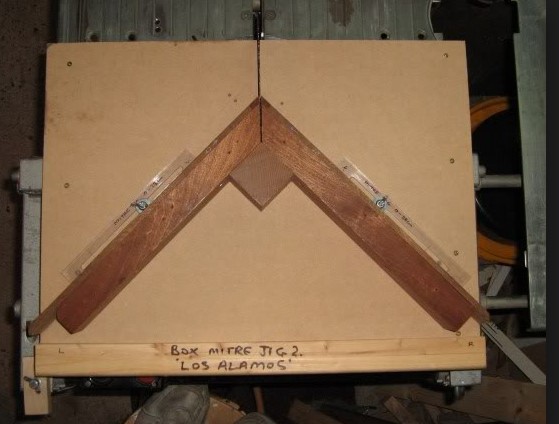
    Secure two segments measuring around 25x60mm each to craft a right-angle configuration. The alignment of these sections to a 45-degree angle concerning the saw blade is of paramount importance. This configuration underpins the precision of your mitre cuts.

    Step 5: Ensuring Flawless Alignment

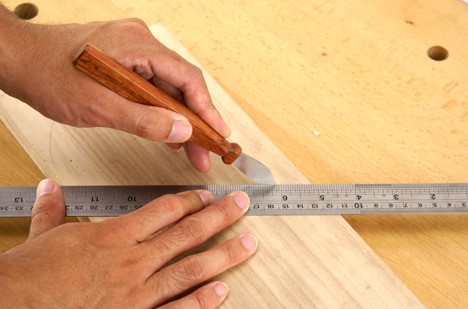
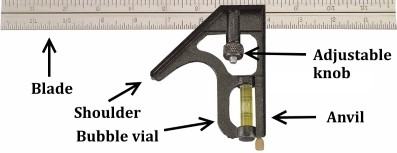
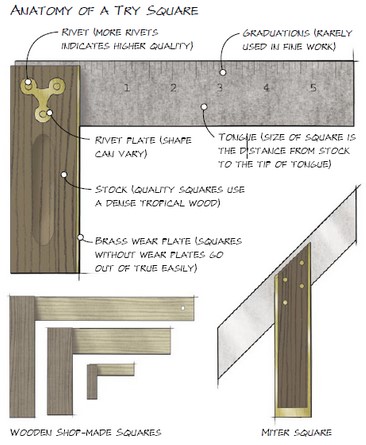
    Before tightening the screws that secure the angle components, introduce a square within the formed right angle. This step stands as a critical validation of the angle segments' precise 90-degree alignment. The accuracy of your jig hinges on this alignment. Exercise patience during this stage to avert any inconsistencies in your mitre cuts in subsequent phases.

    Prioritizing Safety: Safeguarding the Blade

    To ensure your safety while employing the jig, contemplate installing a protective enclosure over the blade. While a Perspex cover emerges as an effective choice, it's worth noting that occasional cleaning might be requisite. Safety should remain sacrosanct, especially when dealing with meticulous cuts required for framing and segmented projects. Incorporating these safety protocols will furnish you with a sense of assurance as you engage with your freshly fabricated jig.

    Conclusion:

    The days of grappling with accurate 45-degree mitres are behind you, all thanks to this in-house jig that imparts the necessary precision to your framing and segmented woodworking ventures. By adhering to the comprehensive construction roadmap and upholding vigilance toward safety, you can actualize a dependable tool that guarantees the precision of your cuts and the excellence of your undertakings. Embark on this journey and acquaint yourself with this jig – it's time to elevate your woodworking craftsmanship!

    Mastering Precision in Woodworking: Unveiling Essential Measuring Tools for Your Workshop
    0 Mastering Precision in Woodworking: Unveiling Essential Measuring Tools for Your Workshop

    Precision reigns supreme in the realm of woodworking and craftsmanship. Whether you're a seasoned professional or a dedicated hobbyist, the foundation of successful projects lies in accurate measurements. While tape measures, rulers, and try squares hold their well-deserved positions in every workshop, a trove of lesser-known measuring tools exists, ready to enhance your precision game. In this article, we'll explore these tools that have the potential to become your trusted allies.

    Marking Knife: The Epitome of Precision

    When uncompromising accuracy is essential, the marking knife takes the spotlight. This instrument's slender, precise line creates a marking outline that fits seamlessly against the rule, eliminating any margin for errors. In contrast to pencils, it maintains its edge over time, ensuring consistent accuracy.

    Combination Square: Versatility Redefined

    The combination square transcends its square shape, evolving into a versatile multitool that's indispensable in any workshop. Let's delve into its capabilities:

    • By sliding the rule within its housing, easy parallel line marking becomes achievable.
    • Measuring the depth of mortises becomes effortless by inserting the rule into the joint and referencing the base.
    • Accurate 45-degree mitres are a simple task.
    • The incorporated spirit level simplifies shelf levelling.
    • The built-in scribing point aids in drawing exact lines.
    • Enhance its functions with accessories like the centre-finding head and protractor for diverse angles.

    Try Square: Your Trusted Accuracy Companion

    Quality is pivotal when it comes to Try squares. Seek out a square with a Rosewood base and brass inlay to counteract wear. Validate its precision by marking parallel lines with a recognized straight edge, ensuring consistent measurements from both sides of the square.

    Vernier Callipers: Elevating Precision

    While not intended for marking, vernier callipers are indispensable for meticulous measurements. Capable of measuring down to 0.1mm, they're a necessity for critical accuracy. The scale is read from the 0-marked line on the right-side jaw. To determine the next decimal point, align the lines on the lower scale with those on the scale above. Digital variations offer even greater user-friendliness, provided the battery is operational.

    Spring Dividers or Compasses: Perfect for Intervals and Circles

    Whether you're marking regular intervals or circles, spring dividers come to your aid. These tools aren't solely beneficial for woodturners; they also serve as invaluable companions for a range of projects.

    Trammel Points: Crafting Grand Circles

    When the task involves sketching large circles, trammel points come into play. Utilizing a ruler or wooden strip as a spacer, they're ideal for projects involving bandsaws or jigsaws to cut circles.

    INCRA Rules: Precision with Flair

    INCRA rules elevate accuracy with grooves spaced at 1mm intervals. Slide a 0.5mm lead pencil through these grooves for unparalleled precision in your measurements.

    Conclusion:

    In the world of woodworking, the choice of measuring tools can be the decisive factor between a flawless masterpiece and a disappointing mishap. Beyond the familiar tape measures and squares, a myriad of specialized instruments beckons exploration. From marking knives to vernier callipers, each tool contributes its unique prowess, enhancing the precision and excellence of your work. So, the next time you enter your workshop, contemplate diversifying your measuring arsenal – your projects will undoubtedly appreciate it.


    Enhance Woodworking Efficiency: Mastering the Art of Blade Replacement and Height Adjustment
    0 Enhance Woodworking Efficiency: Mastering the Art of Blade Replacement and Height Adjustment

    You may have been postponing the task of replacing the dull blades on your jointer/thicknesser, but believe us, it's a worthwhile job. Operating with blunt blades is unproductive. Allocating just half an hour to complete this task can significantly boost your machine's performance and the quality of your woodworking projects. In this guide, we'll take you through the process of changing and adjusting the blades on your jointer/thicknesser to ensure optimal operation.

    Step 1: Removing and Cleaning Blades

    The initial step in this process involves taking out the dull blades from the cutter block. Once removed, take some time to thoroughly clean the slots in the cutter block. Dust, chips, and resin can accumulate in these slots over time, negatively impacting the blade's performance.

    Step 2: Setting the Blade Height

    Achieving the correct blade height is essential for achieving smooth and precise cuts. Aim to set the maximum blade height to about 0.2mm above the outfeed table surface, approximately the thickness of a newspaper. A common method for getting this height right is by using a straight edge with two marks spaced roughly 3mm apart. Set the height so that as you rotate the cutter block, the straight edge moves seamlessly from one mark to the next. This process should be repeated for all three blades to ensure consistent results.

    Step 3: Testing and Refining the Height

    After establishing the blade height, it's time to test your adjustments. Start by surfacing a piece of wood and look for any signs of "snipe," which is a slightly deeper cut that occurs at the end of the wood piece. If you observe snipe, adjust the blade height until it disappears. It's crucial to find the right balance – setting the blades too low might result in a tapered cut. Take your time to achieve the perfect blade height setting.


    Step 4: Using Blade Setting Gauges

    To make the height adjustment process even more efficient, you can utilize a blade setting gauge. This gauge comes with magnetized feet and a probe. Before removing the old blades, measure the blade height using the gauge. When inserting the new blades, you can use the same measurement for swift and accurate blade positioning. The magnetic properties of the gauge will hold the blades in place, simplifying the setting process. This versatile tool can also be employed for thicknesser blades.


    Conclusion:

    While it might seem tempting to postpone the replacement and adjustment of your jointer/thicknesser blades, the undeniable performance improvements make it a worthwhile endeavour. By dedicating just 30 minutes to this process, you're ensuring that your woodworking machine operates at its peak efficiency, delivering high-quality results in your projects. Don't hesitate – follow these steps to replace and set your blades correctly and experience the transformative impact it can have on your woodworking projects.

    From Raw Timber to Masterpiece Canvas: Demystifying Wood Perfection
    0 From Raw Timber to Masterpiece Canvas: Demystifying Wood Perfection

    Imagine envisioning an awe-inspiring woodworking masterpiece and having the perfect timber at your disposal. However, before starting the creative process, there is an essential step that can make or break the finished product: the preparation of wood. The essence lies in the conversion of raw timber into a meticulously squared marvel - one that boasts of being straight, level, and primed for your artistic flair. In this article, we will demystify the process of attaining wood perfection, even for those who may not be well-versed in the craft of hand-planing.

    The Foundation: Precisely Dressed Wood

    At the core of every triumphant woodworking project lies precisely dressed wood. It transcends mere flatness, encapsulating three fundamental attributes:

    1. Unwavering Straightness: No contortions, no deviations. Just timber that stands tall and unwavering.
    2. Seamless Flatness: A surface so smooth and uniform that it practically calls out for your creative touch.
    3. Perpendicular 90-Degree Edge: A crisp edge that perfectly aligns at a right angle with the broad surface.

    Crafting Excellence: Transitioning from Experience to Machinery

    While the experienced woodworker might achieve perfection through years of hand plane mastery, the rest of us are fortunate to have access to machinery that simplifies this challenge. These contemporary wonders are none other than surface planers and thicknessers, occasionally amalgamated into a singular apparatus known as a planer/thicknesser.

    Step-by-Step Guide

    Let's embark on a journey through the steps that metamorphose raw timber into your canvas for woodworking:

    1. Flattening the Surface

    By employing a surface planer, guide your wood plank through the apparatus. A modest cut of approximately 1.5mm across a couple of iterations will suffice. Prioritize safety by ensuring the guard is in place. This phase culminates in an impeccably flat surface on one facet, serving as a robust foundation for your project.


    1. Creating a Flawless 90-Degree Angle

    Once the flat surface is established, shift your focus towards aligning one edge. Configure the fence to be precisely at a 90-degree angle in relation to the table. Match the recently planed flat surface against the fence and execute several passes. This manoeuvre results in a straight edge with a flawless right angle, setting the stage for meticulous artistry.

    1. Embracing Thickness Mode

    Transition into the thickness mode by elevating the table, revealing a supplementary one beneath. Introduce the wood to the mechanism, guided by integrated rollers. Customize the table height via the control knob. This facet grants you the autonomy to dictate the ultimate thickness of your wood, catering to the specifications of your project.


    1. Completion of Timber Transformation

    Behold! You now possess wood that's squared on three sides. The fourth side, often tailored to suit your project's requirements, is typically shaped using a saw before being planed for a sleek finish.

    Bonus Tip: Indicating Prepared Surfaces

    As a gesture of prudent practice, consider marking the surfaces you've readied. This uncomplicated step guarantees that you remain mindful of which surfaces are prepared for your imaginative finesse.

    In Conclusion

    Triumph in the realm of woodworking is rooted in the meticulous preparation of wood. Equipped with surface planers, thicknessers, and a hint of contemporary technology, the journey towards achieving precisely dressed wood is no longer an arduous expedition. The transition from raw timber to a canvas poised for masterpiece creation is now at your fingertips. Embrace the discipline of preparation and watch your woodworking ventures radiate brilliance like never before.

    A Breathable Workshop Environment: The Significance of Dust Collection
    0 A Breathable Workshop Environment: The Significance of Dust Collection

    If you're someone passionate about woodworking, you're well acquainted with the constant presence of dust throughout your creative journey. However, have you considered the potentially serious repercussions of neglecting proper dust collection? Beyond merely contributing to a disorderly workspace, dust can give rise to health hazards and compromise the quality of your craftsmanship. Let's delve into the realm of dust collection and explore how it has the power to revolutionize your woodworking endeavours.

    The Importance of Dust Collection

    Dust isn't just an aesthetic inconvenience; it holds the potential to impact both your health and the overall functionality of your workspace. The advantages of effectively managing dust are manifold:

    Enhanced Workspace Safety: A tidy work area significantly reduces the likelihood of accidents. Stumbling over scattered debris or slipping on a dusty floor can abruptly transform a productive session into a calamity.

    Improved Air Quality: Inhalation of dust particles, particularly when working with woods that carry health risks or trigger allergies, can be detrimental to your well-being. Proper dust collection plays a pivotal role in maintaining clean air and ensuring the well-being of your respiratory system.

    Essential Tools for Managing Dust

    To effectively combat the issue of dust, it's imperative to equip yourself with the appropriate tools.

    Let's explore a few efficient methods for dust control:

    Facial Masks: While basic disposable paper masks offer minimal protection, opting for double-filter masks ensures superior filtration, safeguarding the health of your lungs.

    Face mask

    Filter

    Vacuum Machines: These robust machines efficiently eliminate dust at its source. By directly connecting them to your tools, you can revel in a pristine workspace as you work. Additionally, their versatility extends to handling liquids, accompanied by the convenience of mobility.

    Vacuum machine

    Suspended Ceiling Filter Machines: By suspending these machines from above, you maintain the purity of the air. Not only do they prevent dust from re-entering the atmosphere, but they also provide a range of filter materials tailored to your specific needs.

    Choosing the Right Filter Fit

    Selecting the appropriate filter holds the key to success. Here are several options to consider:

    Standard Fabric Bags: These filters, with a particle capture capacity of 30 microns, offer fundamental protection.

    Fine Weave Fabric: With a denser structure capable of filtering particles down to 5 microns, this option elevates filtration effectiveness.


    Paper Filter Cartridge: Representing a more advanced choice, this filter operates at an impressive 2-micron level and incorporates a clever agitator mechanism, prolonging its lifespan.

    Mastery of Dust Collection Techniques

    For optimal dust collection, embrace these strategies:

    Cyclone Dust Extractors: At the forefront of efficiency, these extractors leverage a vortex to segregate debris from dust, resulting in highly effective outcomes. Keep in mind their higher cost and potential requirement of 3-phase motors.

    Remote Control Convenience: Ceiling-mounted filter machines often feature remote infrared controllers. This innovation empowers you to regulate speed and even establish a timer for automated shut-off.

    Air filtration systems

    Synergy with Dust Extractors: Achieve unparalleled outcomes by utilizing a dust extractor in conjunction with a filter machine. This dynamic combination ensures maximal dust eradication.

    As a final thought, maintaining a clean workspace transcends aesthetics—it's a fundamental matter of safety, health, and the craftsmanship you dedicate yourself to. Embrace the realm of dust collection, cultivating a woodworking sanctuary that not only fuels creativity but also prioritizes well-being. Your lungs and your latest masterpiece will undoubtedly express their gratitude!