
From Raw Timber to Masterpiece Canvas: Demystifying Wood Perfection

Imagine envisioning an awe-inspiring woodworking masterpiece and having the perfect timber at your disposal. However, before starting the creative process, there is an essential step that can make or break the finished product: the preparation of wood. The essence lies in the conversion of raw timber into a meticulously squared marvel - one that boasts of being straight, level, and primed for your artistic flair. In this article, we will demystify the process of attaining wood perfection, even for those who may not be well-versed in the craft of hand-planing.
The Foundation: Precisely Dressed Wood
At the core of every triumphant woodworking project lies precisely dressed wood. It transcends mere flatness, encapsulating three fundamental attributes:
- Unwavering Straightness: No contortions, no deviations. Just timber that stands tall and unwavering.
- Seamless Flatness: A surface so smooth and uniform that it practically calls out for your creative touch.
- Perpendicular 90-Degree Edge: A crisp edge that perfectly aligns at a right angle with the broad surface.
Crafting Excellence: Transitioning from Experience to Machinery
While the experienced woodworker might achieve perfection through years of hand plane mastery, the rest of us are fortunate to have access to machinery that simplifies this challenge. These contemporary wonders are none other than surface planers and thicknessers, occasionally amalgamated into a singular apparatus known as a planer/thicknesser.
Step-by-Step Guide
Let's embark on a journey through the steps that metamorphose raw timber into your canvas for woodworking:
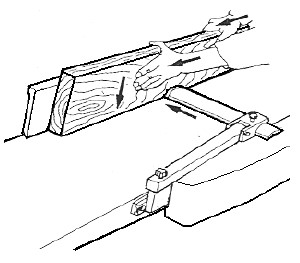
- Flattening the Surface
By employing a surface planer, guide your wood plank through the apparatus. A modest cut of approximately 1.5mm across a couple of iterations will suffice. Prioritize safety by ensuring the guard is in place. This phase culminates in an impeccably flat surface on one facet, serving as a robust foundation for your project.
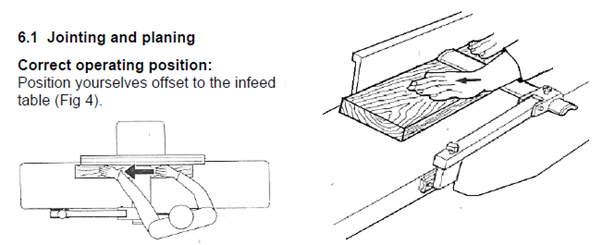
- Creating a Flawless 90-Degree Angle
Once the flat surface is established, shift your focus towards aligning one edge. Configure the fence to be precisely at a 90-degree angle in relation to the table. Match the recently planed flat surface against the fence and execute several passes. This manoeuvre results in a straight edge with a flawless right angle, setting the stage for meticulous artistry.
- Embracing Thickness Mode
Transition into the thickness mode by elevating the table, revealing a supplementary one beneath. Introduce the wood to the mechanism, guided by integrated rollers. Customize the table height via the control knob. This facet grants you the autonomy to dictate the ultimate thickness of your wood, catering to the specifications of your project.
- Completion of Timber Transformation
Behold! You now possess wood that's squared on three sides. The fourth side, often tailored to suit your project's requirements, is typically shaped using a saw before being planed for a sleek finish.
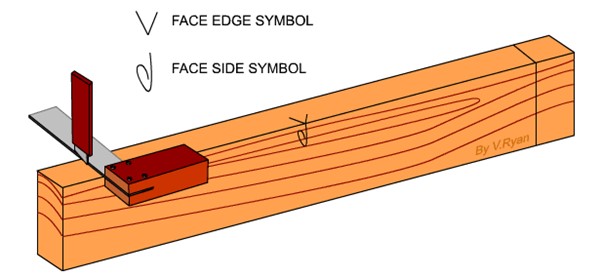
Bonus Tip: Indicating Prepared Surfaces
As a gesture of prudent practice, consider marking the surfaces you've readied. This uncomplicated step guarantees that you remain mindful of which surfaces are prepared for your imaginative finesse.
In Conclusion
Triumph in the realm of woodworking is rooted in the meticulous preparation of wood. Equipped with surface planers, thicknessers, and a hint of contemporary technology, the journey towards achieving precisely dressed wood is no longer an arduous expedition. The transition from raw timber to a canvas poised for masterpiece creation is now at your fingertips. Embrace the discipline of preparation and watch your woodworking ventures radiate brilliance like never before.
