
Enhance Woodworking Efficiency: Mastering the Art of Blade Replacement and Height Adjustment

You may have been postponing the task of replacing the dull blades on your jointer/thicknesser, but believe us, it's a worthwhile job. Operating with blunt blades is unproductive. Allocating just half an hour to complete this task can significantly boost your machine's performance and the quality of your woodworking projects. In this guide, we'll take you through the process of changing and adjusting the blades on your jointer/thicknesser to ensure optimal operation.
Step 1: Removing and Cleaning Blades
The initial step in this process involves taking out the dull blades from the cutter block. Once removed, take some time to thoroughly clean the slots in the cutter block. Dust, chips, and resin can accumulate in these slots over time, negatively impacting the blade's performance.
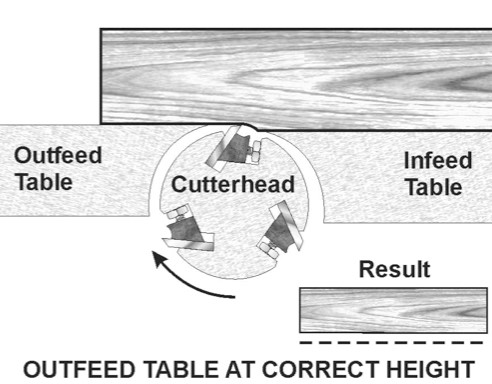
Step 2: Setting the Blade Height
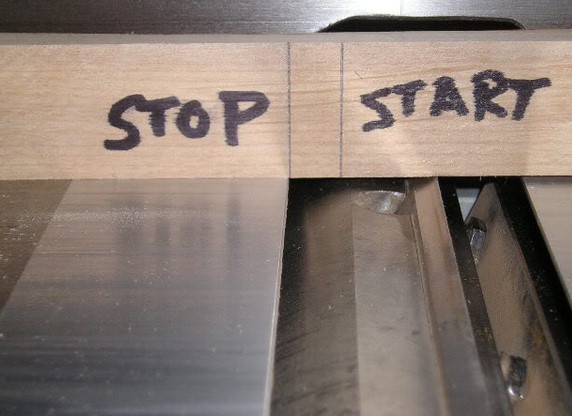
Achieving the correct blade height is essential for achieving smooth and precise cuts. Aim to set the maximum blade height to about 0.2mm above the outfeed table surface, approximately the thickness of a newspaper. A common method for getting this height right is by using a straight edge with two marks spaced roughly 3mm apart. Set the height so that as you rotate the cutter block, the straight edge moves seamlessly from one mark to the next. This process should be repeated for all three blades to ensure consistent results.
Step 3: Testing and Refining the Height
After establishing the blade height, it's time to test your adjustments. Start by surfacing a piece of wood and look for any signs of "snipe," which is a slightly deeper cut that occurs at the end of the wood piece. If you observe snipe, adjust the blade height until it disappears. It's crucial to find the right balance – setting the blades too low might result in a tapered cut. Take your time to achieve the perfect blade height setting.
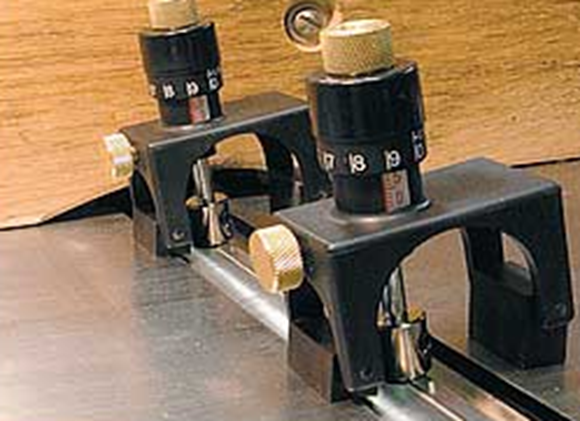
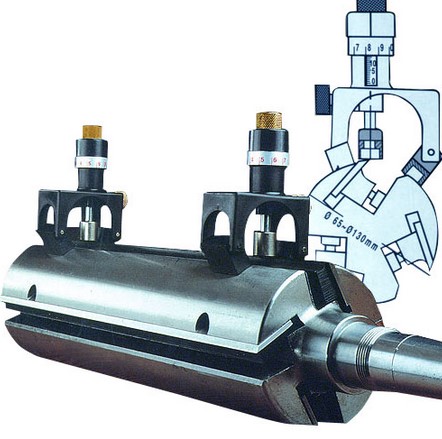
Step 4: Using Blade Setting Gauges
To make the height adjustment process even more efficient, you can utilize a blade setting gauge. This gauge comes with magnetized feet and a probe. Before removing the old blades, measure the blade height using the gauge. When inserting the new blades, you can use the same measurement for swift and accurate blade positioning. The magnetic properties of the gauge will hold the blades in place, simplifying the setting process. This versatile tool can also be employed for thicknesser blades.
Conclusion:
While it might seem tempting to postpone the replacement and adjustment of your jointer/thicknesser blades, the undeniable performance improvements make it a worthwhile endeavour. By dedicating just 30 minutes to this process, you're ensuring that your woodworking machine operates at its peak efficiency, delivering high-quality results in your projects. Don't hesitate – follow these steps to replace and set your blades correctly and experience the transformative impact it can have on your woodworking projects.