Close
All Categories
    Filters
    Preferences
    Search
    RSS

    Blog posts of '2023' 'August'

    Unlocking the Potential of Drum Sanders: Tips, Techniques and Benefits
    0 Unlocking the Potential of Drum Sanders: Tips, Techniques and Benefits

    Are you weary of dedicating endless hours to manual sanding of flat panels, doors, and components? Drum sanders can be the quick fix you've been looking for. We will examine the many benefits of drum sanders in this blog and provide some priceless tips to ensure you get the most out of these amazing machines.

    JET 22-44 Drum Sander

    Drum Sanders: Revolutionizing the World of Woodworking

    Imagine obtaining equal thickness while sanding your materials, a feat that was previously thought to be impossible using traditional sanding techniques. Drum sanders accomplish that. Their genius is in the mechanism; a revolving drum expertly controls the sanding operation while a black conveyor belt softly moves your stuff through the device. These are some crucial advantages:

    Uniform Thickness:

    Drum sanders shine in their ability to uphold a consistent thickness, a task fraught with difficulty using alternative sanding techniques.

    Adjustable Feed Rate:

    You wield control over the feed rate, granting you the capability for precision sanding. For that ultimate, impeccable finish, opt for fine paper in tandem with a slow feed rate.

    Economical Sandpaper Usage:

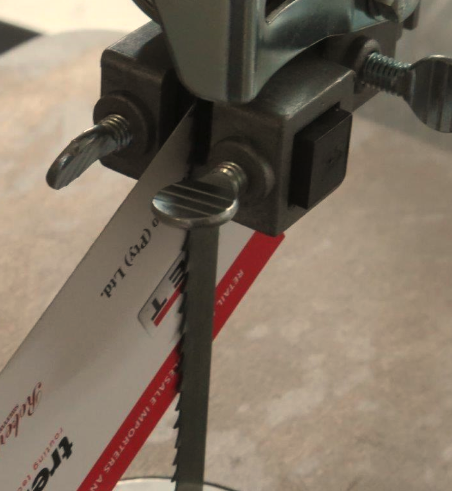
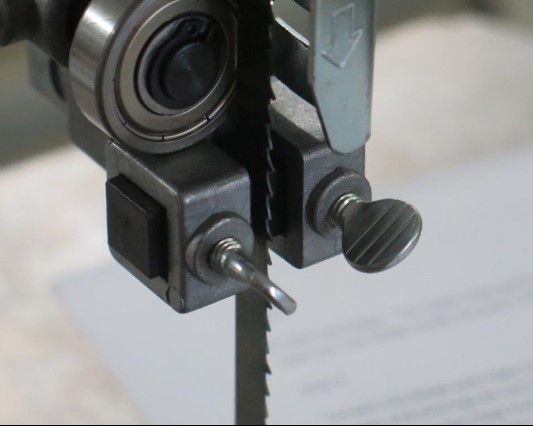
    These sanders utilize 75mm wide strips of sandpaper that can be effortlessly substituted in just about 2 minutes. Bid farewell to pricey tailor-made sleeves!

    Ideal for Delicate Materials:

    Drum sanders prove ideal for delicate materials. You can even craft your veneer by amalgamating a band saw with a drum sander. Wood can be honed to a paper-thin perfection.

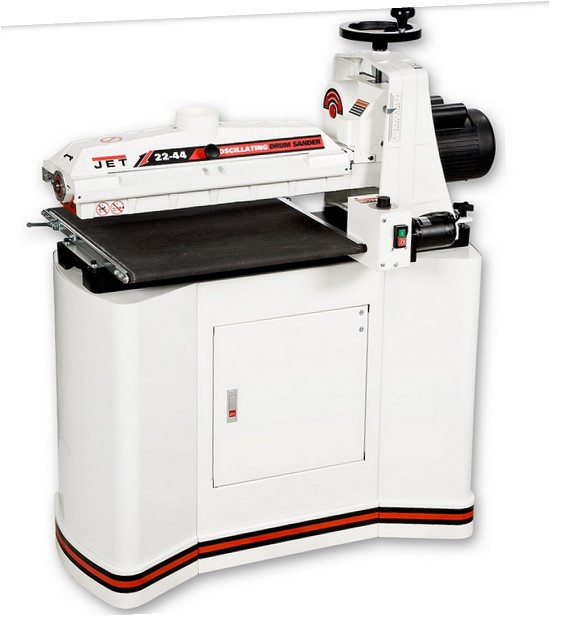
    Oscillating Motion (Jet 2244OSC):

    Certain drum sanders, such as the Jet 2244OSC, encompass an oscillating drum. This drum not only revolves but also sways laterally about 25mm. This ingenious feature thwarts the emergence of undesirable tramlines in the final product, contingent on the type of wood employed.

    Superlative Craftsmanship:

    When you invest in a drum sander, you're essentially investing in precision. Manufacturers like Jet go to great lengths to ensure the feed table remains perfectly level, ensuring absolute accuracy in your projects.

    Expert Tips for Maximizing Drum Sander Performance

    Now that you've been introduced to the marvels of drum sanders, here are some seasoned tips to optimize their efficiency:

    Sand in Both Directions:

    For an even finer finish, experiment with sanding in the opposite direction while maintaining the same settings. This technique often yields superior results, as attested by many seasoned woodworkers.

    Consider a Rubber Belt Cleaner:

    To prolong the lifespan of your sandpaper, contemplate utilizing a rubber belt cleaner. This unassuming tool effectively cleans the sandpaper by gently pressing a rubber stick against the revolving drum. However, its efficacy may be diminished in the presence of substantial resin buildup.

    Prioritize Dust Extraction:

    Safety takes precedence! Drum sanders generate a significant volume of dust. The use of a dust extractor not only ensures a tidy workspace but also dramatically extends the longevity of your sandpaper.

    In conclusion, drum sanders are a game-changing tool for the woodworking industry. They not only give you precision while saving you time, but they also produce amazing outcomes. Keep these expert pointers in mind to elevate the performance of your drum sander, making your woodworking endeavours a breeze. If you have the necessary equipment and knowledge, you can strive for greatness in woodworking. Have fun sanding!

    Choosing the Right Sander for Your DIY Project: A Comprehensive Guide
    0 Choosing the Right Sander for Your DIY Project: A Comprehensive Guide

    So, you've started a DIY project that requires sanding. Yet, choosing the best sander for your task might be difficult given the wide array of sanders available today. In the past, our options were few, but today, we have access to a broad range of sanders, each designed for specific purposes. We'll explore the many sander options available to you, along with their uses, to help you reach a well-informed decision for your upcoming project.

    Diverse Range of Sanders:

    1. Belt Sanders:

    Let's initiate our exploration with the heavyweight contender in the world of sanding—the belt sander. This powerhouse is ideal for substantial stock removal over expansive areas. Thanks to its coarse belt, it possesses an aggressive sanding action that can swiftly eliminate old paint. Yet, caution is advised, as even the slightest tilt can result in gouges on the wood. Moreover, belt sanders are prone to rapid clogging and are not recommended for floor sanding.

    1. Random Orbit Sanders with Geared Action:

    For those seeking a versatile sander capable of both robust and delicate sanding, the random orbit sander with geared action is worth considering. Its standout feature is the geared movement that causes the sanding disc to follow a sinusoidal pattern, allowing for more forceful sanding when necessary. This sander, often referred to as a multitasker, handles everything from coarse stock removal to meticulous tabletop finishing. It also excels in dust extraction, preserving the cleanliness of your workspace and extending the life of your sandpaper.

    1. Random Orbit Sanders without Geared Action:

    The random orbit sander without geared action serves as the quintessential finishing sander. It features a flat sponge pad that minimizes the risk of unsightly swirl marks. Additionally, many models come equipped with a dust collection bag, negating the need for a separate vacuum.

    1. Orbital Sanders:

    If your priority is a sander that won't leave unsightly marks on your wood, orbital sanders are a wise choice. They come in various sheet sizes, ranging from ¼ to ½, tailored to different applications. Orbital sanders shine in final finishing and typically arrive with a dust collection bag. They also employ standard sanding sheets, which are cost-effective and easy to replace.

    1. Detail Sanders:

    Detail sanders are akin to the Swiss Army knives of sanding, excelling in an array of tasks. Their versatility extends to tasks like grout removal, putty extraction from window frames, door trimming in situ, cutting thin sheet metal, sanding challenging or inaccessible areas, creating cavities in drywall, and polishing metal. Some models even offer interchangeable attachments, including scraper blades, saw blades, and plunge saw blades.

    Choosing the Right Sander:

    When in the process of selecting the appropriate sander for your task, take these considerations into account:

    Project Size: For larger areas, your best options are belt sanders or random orbit sanders with geared action.

    Finish Quality: If you require a refined finish, lean toward random orbit sanders without geared action or orbital sanders.

    Versatility: Should your project demand a multipurpose tool, detail sanders with assorted attachments or multi-purpose machines from reputable brands such as Fein, Makita, and Bosch are your go-to choices.

    Always keep in mind that the correct choice of sander can significantly enhance the efficiency and enjoyment of your DIY project. Whether you're restoring furniture, refinishing floors, or tackling intricate details, there's undoubtedly a sander designed to meet your specific needs.

    In Conclusion:

    With the diverse range of sanders available today, you can confidently pinpoint the one best suited to your DIY project. From the robust belt sanders to the versatile multi-purpose machines, there exists a tool tailored for every task. By thoughtfully considering your project's scale, desired finish quality, and versatility requirements, you will be well-prepared to achieve outstanding results while maintaining a cleaner and more efficient workspace. Wishing you a productive and satisfying sanding experience!

    Unlocking the Versatile Potential of Portable Routers: A Guide to Precision Woodworking
    0 Unlocking the Versatile Potential of Portable Routers: A Guide to Precision Woodworking

    Over the past thirty years, woodworking has progressed remarkably, but amid this evolution, one tool has emerged as a game-changer in workshops—the portable router. Its versatility and diverse applications have elevated it to an indispensable companion for woodworking enthusiasts, whether professional or DIY. This article explores the multifaceted capabilities of the portable router, ranging from shaping edges to intricate inlay work, while also providing crucial insights into safety precautions and factors to consider when purchasing this tool.

    Unlocking the Portable Router's Extensive Abilities:

    The portable router is a genuine workhorse that can undertake an impressive array of tasks, revolutionizing woodworking by introducing a new level of precision and creativity. Below are just a few examples of its remarkable abilities:

    Edge Forming: Effortlessly craft classic beading or intricate ogee profiles, enhancing the refined aesthetics of your woodworking projects.

    Lap Joints: Establish seamless connections through lap joints, reinforcing the structural integrity of your creations.

    Dovetail Joints: Employ the router's precision to create dovetail joints, renowned for their strength and visual appeal in fine woodworking.

    Rebates: Achieve immaculate rebates, ensuring components fit flawlessly together and contributing to a seamless finish.

    Carving and Lettering: Unleash intricate carving and lettering possibilities, transforming ordinary surfaces into personalized artistic expressions.

    Inlay Work: Elevate your woodworking projects to a museum-worthy level with captivating inlay designs that showcase your craftsmanship.

    Laminate Trimming: Achieve smooth, professional laminate edges, using the router's precision for impeccable trimming.

    Mortise and Tenon Joints: Craft accurate mortise and tenon joints for enduring connections that withstand the test of time.

    Fitting Mortise Door Locks and Door Hinges: Attain precise fits for door locks and hinges, ensuring seamless door functionality.

    Ellipse and Circle Cutting: Seamlessly cut precise ellipses and circles, adding distinctive shapes to your creations.

    Trenching and Dadoes: Achieve grooves and dadoes with exceptional precision, catering to shelving and other joinery requirements.

    Glue Joints: Employ the router to create tight-fitting glue joints, enhancing the strength and durability of your projects.

    Style and Rail Joints for Raised Panel Doors: Showcase your woodworking finesse by crafting classic raised panel doors with elegant style and rail joints.

    Panel Raising: Introduce dimension and elegance to cabinet doors and panels through distinctive raised panels.

    Post-Form Top Joining: Enhance furniture aesthetics and functionality by creating seamless joins for post-form tops.

    Prioritizing Safety During Router Operation:

    Despite its power, safety remains paramount when operating a router. Adhering to these safety guidelines ensures incident-free woodworking sessions:

    Clean Collet: Regularly clean the collet to maintain a secure bit grip, preventing any compromise due to dust or grime accumulation.

    Proper Bit Insertion: Insert the router bit with around 2/3rds of the shaft securely held by the collet, paying heed to any depth indicators.

    Two-Handed Operation: Maintain control and stability by always gripping the router with both hands when the motor is active.

    Feed Rate: Opt for an optimal feed rate; too slow leads to burning, while excessive speed overloads the motor. A medium rate delivers optimal outcomes.

    Cutting Direction: For enhanced control and precision, consistently cut against the cutter's rotation direction.

    Bit Maintenance: Keep bits sharp and clean, utilizing a flat diamond grit card to sharpen the cutting face's back. Post-use, oil and clean the bit to prevent rust.

    Protective Gear: Shield against noise and dust by donning ear defenders and a dust mask, ensuring a safer working environment.

    Choosing Router Bits Wisely:

    When investing in router bits, quality reigns supreme, impacting performance and durability:

    Shank Sizes: In the South African market, router-bit shank sizes commonly come in ¼” and ½”. These diverge from the European 6mm and 12mm counterparts.

    Industrial vs. Portable: Heavy-duty ½” shank routers are prevalent in industrial settings, frequently mounted on router tables. Meanwhile, ¼” shank routers offer portability and ease of use.

    Quality is Key: Opt for quality over cost when selecting router bits. Superior bits boast smoother bearings and better tungsten carbide, ensuring longevity and precision.

    In Conclusion:

    The portable router has rewritten the possibilities of woodworking, endowing a broad spectrum of capabilities that enhance craftsmanship. From intricate designs to seamless joints, this adaptable tool broadens horizons in both creativity and accuracy. By adhering to safety protocols and investing in high-quality bits, your woodworking journey with the portable router is bound to be gratifying and productive.


    Mastering Bandsaw Precision: A Comprehensive Guide to Blade Selection and Alignment
    0 Mastering Bandsaw Precision: A Comprehensive Guide to Blade Selection and Alignment

    Bandsaws, versatile tools renowned for their precision in woodworking tasks, occasionally encounter obstacles that impede their performance. Within this article, we will delve into prevalent issues faced by bandsaw users—blades breaking, inaccurate cuts, and unwelcome noises. We will delve into the correlation between these issues and blade selection and improper alignment, offering practical advice to overcome these challenges and relish seamless cutting outcomes.

    Selecting the Right Blade: Ensuring Precision

    The selection of an appropriate blade is pivotal to achieving accuracy and avert potential complications.

    Here's what warrants consideration:

    Determining Blade Length: Accurate blade length is paramount. In cases where it's absent from the machine's nameplate, measurement of a fitting old blade suffices. Employ a felt-tipped pen to mark the starting point for measurement.

    Choosing Blade Width: Blade width influences cut curvature.

    • Utilize a 6mm blade for intricate curves.
    • Opt for a 10mm blade for straight and moderately curved cuts.
    • Select a 13mm blade for primarily straight cutting.

    Tooth Arrangement: Coordinating tooth configuration with wood thickness is vital. The goal is around 3 teeth engaging the wood.

    While acquiring coarser blades beyond 4 teeth per inch (tpi) is demanding, adhere to this rule of thumb:

    • 14 tpi for 6mm thick wood.
    • 6 tpi for 12mm thick wood.
    • 4 tpi for wood 20mm or thicker.

    Noise and Blade Coarseness: Annoying sounds often result from deploying a fine blade on thick wood. Counter this by switching to a coarser blade. This spacing between teeth prevents swarf entrapment and the resultant squealing noise.

    Blade Alignment: Crafting Precise Cuts

    Faulty blade alignment undermines precision and introduces frustration. This stepwise guide facilitates blade alignment for optimal outcomes:

    Step 1: Preliminary Alignment Measures

    • Loosen the blade tensioning knob.
    • Remove the table insert and the end-slot pin.
    • Extract the old blade.


    Step 2: Calibration of Blade Guides and Support Bearings

    • Loosen screws and knobs holding blade guides and support bearings. An allen key may be necessary.

    Step 3: Installing the Fresh Blade

    • Confirm that teeth face downward towards the table. Inverting the blade corrects orientation.

    Step 4: Tensioning and Tracking

    • Apply appropriate blade tension (or 6mm deflection over 150mm distance for untitled blades).
    • Verify that the blade follows the centre of the wheel. If necessary, alter the tilt of the upper wheel.

    Step 5: Fine-tuning of Guides and Bearings

    • Start by addressing the bearings positioned behind the blade, both above and below the table.
    • Gradually shift them forward until a 1mm gap emerges between the blade and the bearing.

    • Proceed to adjust the guides situated on either side of the blade.
    • Maintain a minimal distance, roughly equivalent to the thickness of a sheet of paper, between these guides and the blade.
    • A helpful hint: Slide a folded piece of paper or a banknote between the blade and the guide blocks.
    • Apply pressure to secure the two blocks against the blade, locking them securely in place.

    • Afterwards, remove the paper insert and manually rotate the upper wheel to ensure smooth blade movement.
    • Note that these guides offer flexibility in both backward and forward adjustments.
    • Be cautious to prevent contact between the guides and the blade's teeth to prevent any potential blade damage.
    • If you observe wear and tear in the guide blocks, it's advisable to remove them and restore their shape by sanding them squarely with the use of a disc sander.

    Step 6: Validation of Table Alignment

    • Confirm the table's 90-degree alignment with the blade. Make necessary adjustments through table bolts.

    Conclusion

    Adherence to these blade selection and alignment insights empowers you to surmount typical bandsaw challenges, facilitating seamless, accurate, and trouble-free cutting endeavours. Optimal blade choice and precise alignment transform your bandsaw into an instrument of pleasure, instilling the confidence and precision essential for tackling woodworking projects.

    Crafting Excellence with Table Saw Precision: Key Adjustments Every Woodworker Should Know
    0 Crafting Excellence with Table Saw Precision: Key Adjustments Every Woodworker Should Know

    Woodworking enthusiasts are aware of how important accuracy is to their artistic vision. Every woodworking workshop is built around the table saw, a multipurpose tool that transforms unfinished lumber into pieces of art. Precision is the key, depending on four fundamental refinements. We'll walk you through these adjustments in this document to make sure your table saw is set up for success.

    1. Blade Alignment with Mitre Slot Groove: Anchoring Precision

    During the inaugural assembly of your table saw, meticulous attention is dedicated to ensuring the blade's alignment with the mitre slot groove. This preliminary synchrony is pivotal for precise incisions. A straightforward technique to evaluate this alignment entails situating a straight edge adjacent to the blade, followed by using a Vernier calliper to compute the distance from the groove to the rule.

    If you experience any non-parallelism with the blade, don't be concerned. The screws holding the trunnion assembly to the table must be loosened as part of the adaption operation. You can get precise alignment by carefully manipulating the assembly. It becomes necessary to unbolt the bolts holding the table to the framework and then adjust when certain saw models have an immovable trunnion. The good news is that blade parallelism realignments are rarely required, making this step more common practice for many carpenters.

    1. Ensuring Fence Synchrony: Priming for Precision Cuts

    Fences stand as indispensable components of any table saw, yet their configuration varies amidst diverse models. The fundamental principle remains unaltered: the fence must align in parallel with the mitre slot groove. To achieve this congruence, the utilization of adjustment screws is imperative, which modify the angle between the fence and the fence rail. Give this detail plenty of time to be mastered because a well-matched fence ensures that your workpieces will be carefully guided for flawless cuts.

    1. Blade Orthogonality to the Table: The Art of Right Angles

    Determining the blade's orthogonality to the table assumes a pivotal role in obtaining square cuts. For this purpose, employ a square in conjunction with the blade. The tilt mechanism of the saw incorporates a casting that engages an adjustment screw upon reaching a stop. Upon this cessation, the blade should manifest an impeccable 90-degree alignment with the table. This tuning guarantees that your incisions are not solely precise but also geometrically congruous.

    1. Mitre Square Accordance: The Culmination of Adjustments

    Making sure your mitre square is perpendicular to the blade is essential for the ideal setup. The use of a square is once again utilized to support this uniformity. You should be able to precisely fine-tune the alignment of your mitre square thanks to adjustment screws. When using the mitre gauge for angled cuts, this step ensures that your workpieces will precisely meet your precision requirements.

    Conclusion: Artisanal Excellence via Table Saw Refinements

    Your woodworking endeavours demand nothing less than quality, and this pursuit of greatness begins with the accuracy of your table saw. You can set the foundation for accurate and satisfying woodworking projects by becoming a master of these four cardinal adjustments: blade parallelism, fence alignment, blade orthogonality, and mitre square conformity. Remember that even though these details might seem technical, they fundamentally support your woodworking knowledge and allow your creativity to shine through flawlessly finished items.