Close
All Categories
    Filters
    Preferences
    Search
    RSS

    Strand Hardware Blog

    Creating Woodworking Masterpieces: The Role of Wood Selection
    0 Creating Woodworking Masterpieces: The Role of Wood Selection

    In the realm of woodworking, your choice of woodworking materials holds immense significance. There are two primary wood categories to consider: softwoods and hardwoods.

    Softwoods like pine and cedar are budget-friendly and suitable for beginners, offering valuable wood selection tips, although they may lack durability.

    Hardwoods such as oak, maple, and cherry are robust, perfect for sturdy projects, and exhibit beautiful grain patterns.

    It's vital to select wood that aligns with your project's requirements and your skill level, as it can greatly influence the outcome.

    In your wood shop, selecting the right wood is pivotal. Factors to contemplate include project type, budget, desired aesthetics, durability, and workability.

    Your choice of wood sets the tone for your woodworking project's success.

    When choosing wood, liken it to selecting paint, as it establishes the project's ambience.

    Consider:

    Wood Choices: Opt for oak for a sturdy dining table or pine for easy shelves.

    Grain Patterns: Oak offers bold grain, while cherry presents a subtler appearance. Be mindful of grain direction, as it affects the project's style.

    Now, let's delve into eco-friendly woodworking. It's not just a trend; it's responsible.

    Sustainable Forestry: Prioritize wood sourced from responsibly managed forests to safeguard trees and woodlands.

    Reclaimed Wood: Breathe new life into aged wood, infusing character while reducing the demand for fresh timber, benefiting both your project and the environment.

    Opting for eco-conscious wood choices allows you to create exquisite pieces while preserving our planet's invaluable resources.

    Time to embrace woodworking!

    Consider these guidelines:

    Storing and Acclimating: Maintain wood in a dry, well-ventilated space, allowing it to adapt to your workspace for a few days. It is recommended to stack boards with small (10–15mm) spacers between them. If not, they may rot or lose their colour. Do not stack flat on the cement, but rather on a level surface.

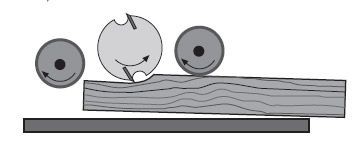
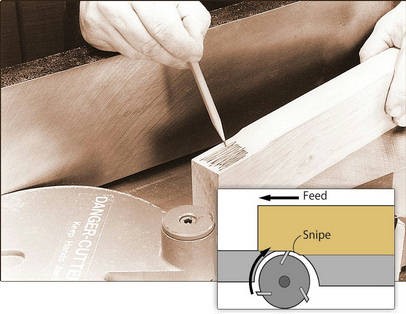
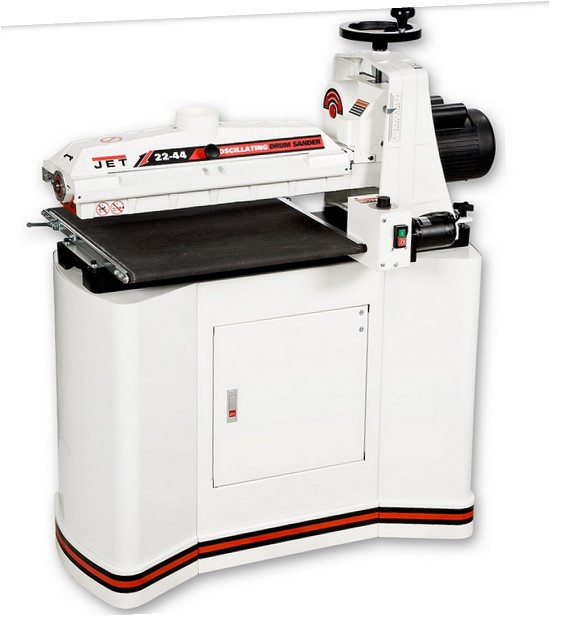
    Cutting, Planing, and Sanding: Precision is paramount. Employ sharp tools, measure meticulously, and work with care. Effective planning and diligent sanding enhance the final finish.

    Dealing with Warped Boards: Warped boards can pose challenges. Utilise jigs or clamps to rectify them or explore alternative options to save time and effort.

    With these insights, you'll shape raw wood into your envisioned woodworking creation. Happy crafting!

    Taming the Woodworker's Frustration: Defeating the Snipe Challenge
    0 Taming the Woodworker's Frustration: Defeating the Snipe Challenge

    For woodworkers, the word "snipe" carries a lot of connotations and troubles. It is the frustrating imperfection that can ruin the otherwise flawless surface of your lovingly constructed wooden piece. But be assured that there are practical solutions to mitigate the harm it causes. In this blog post, we'll examine the causes of snipe and give you useful tips for reducing its frequency in your woodworking projects.

    Unravelling the Mystery of Snipe:

    Let's first obtain a thorough understanding of what sniping indicates before moving on to the solutions. Snipe occurs when your workpiece passes through a jointer or planer and a little piece of wood is rapidly removed from the front and/or back of your workpiece. Although it's a great irritation, it wouldn't be fair to put all the responsibility on the machinery. The operator's role can occasionally be crucial in preventing snipe.

    Inadequate Support:

    Insufficient support for the wood during the machining process ranks among the most prevalent culprits of snipe. To circumvent this issue, consider the following remedies:

    Two-Person Approach:

    If feasible, involve two individuals in the operation—one stationed at the infeed side and the other at the outfeed side. This arrangement ensures proper wood support and elevation to lay flat on the table.

    Embrace Support Rollers:

    Invest in support rollers; they prove invaluable additions to your workshop. These rollers not only stave off snipe but also prove versatile for various other woodworking tasks. They deliver consistent support and stability to your workpieces.

    Mind the Dimensions:

    Bear in mind that shorter and straighter wood pieces are less susceptible to snipe. When possible, opt for materials that conform to these specifications to reduce the likelihood of encountering snipe.

    Tread Lightly with Tension:

    Many machines offer tension adjustment for feed rollers. Exercise caution not to overtighten them, as this can lead to ancillary issues, such as stripped bolts.

    Blade Configuration:

    Snipe can also rear its head on your surface planer due to blade misalignment. When the blades protrude slightly higher than the outfeed table, they can nibble away at the end of your wood piece. Here's how to address this predicament:

    Blade Descent:

    In instances of excessively high blade settings, simply lower the blades to bring them into proper alignment with the outfeed table. This adjustment can significantly curtail the occurrence of snipe.

    Outfeed Table Adjustment:

    Alternatively, you can lower the rear (outfeed) table to facilitate a seamless transition for your wood piece as it exits the planer. This tweak can also serve to eradicate snipe.

    In conclusion, snipe represents a vexing challenge for woodworkers, but it's not insurmountable. By grasping its origins and employing the practical solutions outlined here, you can achieve a smoother finish on your woodworking projects. Remember, a touch of extra care and a keen eye for detail can go a long way in consigning snipe to the annals of your workshop's history. Happy woodworking!

    From Old to Gold: Discover Gilding's Allure with Strand Hardware's Gilt Cream
    0 From Old to Gold: Discover Gilding's Allure with Strand Hardware's Gilt Cream

    Gilding, an exquisite form of artistry, has not seen widespread use in South Africa in recent years. The scarcity of knowledge and limited access to gilding products have contributed to this decline. Strand Hardware is here to provide a solution that will rekindle your passion for this beautiful finishing art.

    Unlocking the Magic of Gilt Cream:

    At the heart of gilding's revival is a remarkable product known as gilt cream. This rich, wax-like paste is infused with metallic pigments, creating a stunning finish no matter where it is applied. Whether you're working on new or old wood and metal surfaces, gilt cream offers limitless creative possibilities.

    Enhancing Protection and Lustre:

    One of the unique qualities of gilt cream is its compatibility with a wax finish. Applying a protective wax coating ensures longevity and enhances the lustre of your gilded creation, giving it a timeless appeal.

    From Old to Gold:

    Imagine turning weathered, wooden picture frames or mirrors into something truly magnificent. Gilt cream possesses a magical ability to make them appear beautifully aged and uniquely charming. Moreover, even a brand-new frame can acquire the charm of a time-worn antique with the application of gilt cream.

    Achieving Spectacular Results:

    Gilding doesn't have to be an overly complex process. With just a few basic steps and some patience, you can embark on a spectacular project that will leave you in awe of your own craftsmanship.

    All You Need, All in One Place:

    Strand Hardware has your gilding needs covered. From the initial base coat to the finishing touches, you'll find all the products required for your project under one roof. Our goal is to make your gilding journey as convenient as possible.

    Unleash Your Creativity:

    The beauty of gilding lies in its versatility. Your project can take on various personalities, from a classic solid finish to an aged, worn look. The possibilities are only limited by your imagination.

    Affordable Elegance:

    You might have considered purchasing pre-gilded mirrors or picture frames, only to be deterred by their high price tags and rarity. The good news is that you can achieve the same level of elegance at a fraction of the cost with Strand Hardware's gilt cream. Plus, a single pot can be used for multiple projects, making gilding not just a creative pursuit but also a budget-friendly one.

    Conclusion:

    Gilding is an art form that can transform the ordinary into something extraordinary. With Strand Hardware's gilt cream, South Africans can rediscover the joy of gilding, regardless of their level of experience. Let your creativity shine and embark on a gilding journey that will leave you with stunning, one-of-a-kind creations. Visit Strand Hardware today and let the magic of gilding enrich your artistic endeavours.

    Unlocking the Potential of Drum Sanders: Tips, Techniques and Benefits
    0 Unlocking the Potential of Drum Sanders: Tips, Techniques and Benefits

    Are you weary of dedicating endless hours to manual sanding of flat panels, doors, and components? Drum sanders can be the quick fix you've been looking for. We will examine the many benefits of drum sanders in this blog and provide some priceless tips to ensure you get the most out of these amazing machines.

    JET 22-44 Drum Sander

    Drum Sanders: Revolutionizing the World of Woodworking

    Imagine obtaining equal thickness while sanding your materials, a feat that was previously thought to be impossible using traditional sanding techniques. Drum sanders accomplish that. Their genius is in the mechanism; a revolving drum expertly controls the sanding operation while a black conveyor belt softly moves your stuff through the device. These are some crucial advantages:

    Uniform Thickness:

    Drum sanders shine in their ability to uphold a consistent thickness, a task fraught with difficulty using alternative sanding techniques.

    Adjustable Feed Rate:

    You wield control over the feed rate, granting you the capability for precision sanding. For that ultimate, impeccable finish, opt for fine paper in tandem with a slow feed rate.

    Economical Sandpaper Usage:

    These sanders utilize 75mm wide strips of sandpaper that can be effortlessly substituted in just about 2 minutes. Bid farewell to pricey tailor-made sleeves!

    Ideal for Delicate Materials:

    Drum sanders prove ideal for delicate materials. You can even craft your veneer by amalgamating a band saw with a drum sander. Wood can be honed to a paper-thin perfection.

    Oscillating Motion (Jet 2244OSC):

    Certain drum sanders, such as the Jet 2244OSC, encompass an oscillating drum. This drum not only revolves but also sways laterally about 25mm. This ingenious feature thwarts the emergence of undesirable tramlines in the final product, contingent on the type of wood employed.

    Superlative Craftsmanship:

    When you invest in a drum sander, you're essentially investing in precision. Manufacturers like Jet go to great lengths to ensure the feed table remains perfectly level, ensuring absolute accuracy in your projects.

    Expert Tips for Maximizing Drum Sander Performance

    Now that you've been introduced to the marvels of drum sanders, here are some seasoned tips to optimize their efficiency:

    Sand in Both Directions:

    For an even finer finish, experiment with sanding in the opposite direction while maintaining the same settings. This technique often yields superior results, as attested by many seasoned woodworkers.

    Consider a Rubber Belt Cleaner:

    To prolong the lifespan of your sandpaper, contemplate utilizing a rubber belt cleaner. This unassuming tool effectively cleans the sandpaper by gently pressing a rubber stick against the revolving drum. However, its efficacy may be diminished in the presence of substantial resin buildup.

    Prioritize Dust Extraction:

    Safety takes precedence! Drum sanders generate a significant volume of dust. The use of a dust extractor not only ensures a tidy workspace but also dramatically extends the longevity of your sandpaper.

    In conclusion, drum sanders are a game-changing tool for the woodworking industry. They not only give you precision while saving you time, but they also produce amazing outcomes. Keep these expert pointers in mind to elevate the performance of your drum sander, making your woodworking endeavours a breeze. If you have the necessary equipment and knowledge, you can strive for greatness in woodworking. Have fun sanding!

    Choosing the Right Sander for Your DIY Project: A Comprehensive Guide
    0 Choosing the Right Sander for Your DIY Project: A Comprehensive Guide

    So, you've started a DIY project that requires sanding. Yet, choosing the best sander for your task might be difficult given the wide array of sanders available today. In the past, our options were few, but today, we have access to a broad range of sanders, each designed for specific purposes. We'll explore the many sander options available to you, along with their uses, to help you reach a well-informed decision for your upcoming project.

    Diverse Range of Sanders:

    1. Belt Sanders:

    Let's initiate our exploration with the heavyweight contender in the world of sanding—the belt sander. This powerhouse is ideal for substantial stock removal over expansive areas. Thanks to its coarse belt, it possesses an aggressive sanding action that can swiftly eliminate old paint. Yet, caution is advised, as even the slightest tilt can result in gouges on the wood. Moreover, belt sanders are prone to rapid clogging and are not recommended for floor sanding.

    1. Random Orbit Sanders with Geared Action:

    For those seeking a versatile sander capable of both robust and delicate sanding, the random orbit sander with geared action is worth considering. Its standout feature is the geared movement that causes the sanding disc to follow a sinusoidal pattern, allowing for more forceful sanding when necessary. This sander, often referred to as a multitasker, handles everything from coarse stock removal to meticulous tabletop finishing. It also excels in dust extraction, preserving the cleanliness of your workspace and extending the life of your sandpaper.

    1. Random Orbit Sanders without Geared Action:

    The random orbit sander without geared action serves as the quintessential finishing sander. It features a flat sponge pad that minimizes the risk of unsightly swirl marks. Additionally, many models come equipped with a dust collection bag, negating the need for a separate vacuum.

    1. Orbital Sanders:

    If your priority is a sander that won't leave unsightly marks on your wood, orbital sanders are a wise choice. They come in various sheet sizes, ranging from ¼ to ½, tailored to different applications. Orbital sanders shine in final finishing and typically arrive with a dust collection bag. They also employ standard sanding sheets, which are cost-effective and easy to replace.

    1. Detail Sanders:

    Detail sanders are akin to the Swiss Army knives of sanding, excelling in an array of tasks. Their versatility extends to tasks like grout removal, putty extraction from window frames, door trimming in situ, cutting thin sheet metal, sanding challenging or inaccessible areas, creating cavities in drywall, and polishing metal. Some models even offer interchangeable attachments, including scraper blades, saw blades, and plunge saw blades.

    Choosing the Right Sander:

    When in the process of selecting the appropriate sander for your task, take these considerations into account:

    Project Size: For larger areas, your best options are belt sanders or random orbit sanders with geared action.

    Finish Quality: If you require a refined finish, lean toward random orbit sanders without geared action or orbital sanders.

    Versatility: Should your project demand a multipurpose tool, detail sanders with assorted attachments or multi-purpose machines from reputable brands such as Fein, Makita, and Bosch are your go-to choices.

    Always keep in mind that the correct choice of sander can significantly enhance the efficiency and enjoyment of your DIY project. Whether you're restoring furniture, refinishing floors, or tackling intricate details, there's undoubtedly a sander designed to meet your specific needs.

    In Conclusion:

    With the diverse range of sanders available today, you can confidently pinpoint the one best suited to your DIY project. From the robust belt sanders to the versatile multi-purpose machines, there exists a tool tailored for every task. By thoughtfully considering your project's scale, desired finish quality, and versatility requirements, you will be well-prepared to achieve outstanding results while maintaining a cleaner and more efficient workspace. Wishing you a productive and satisfying sanding experience!